How To Beat the Heat: Easy DIY Roller Shade
Today we are talking about how to beat the heat with this easy, DIY roller shade! When we first got to Mexico (only a month ago!), we were not prepared for the heat. The RV awning was no match for the sun and we ended up with a virtually unusable patio area.
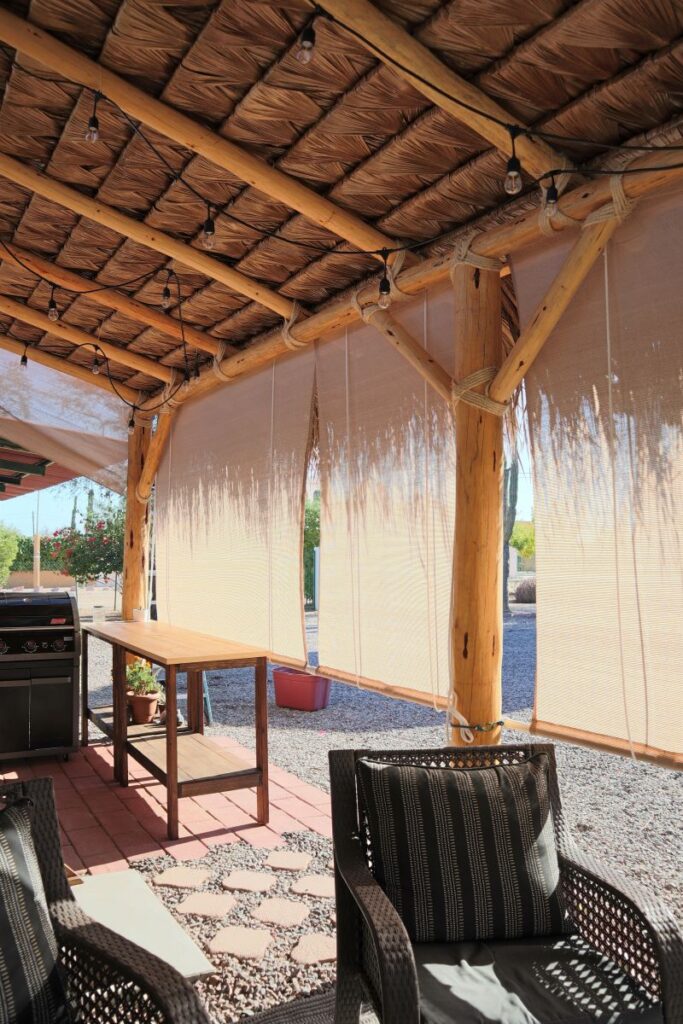
Then we had the palapa installed! This structure protects the roof of our trailer, and also creates a beautiful covered patio. Alas, we still needed a solution to block the beaming sun rays that came in. Instead of an expensive custom system, we created a simple, DIY roller sun shade system that anyone can replicate!
See it in action here on our Instagram!
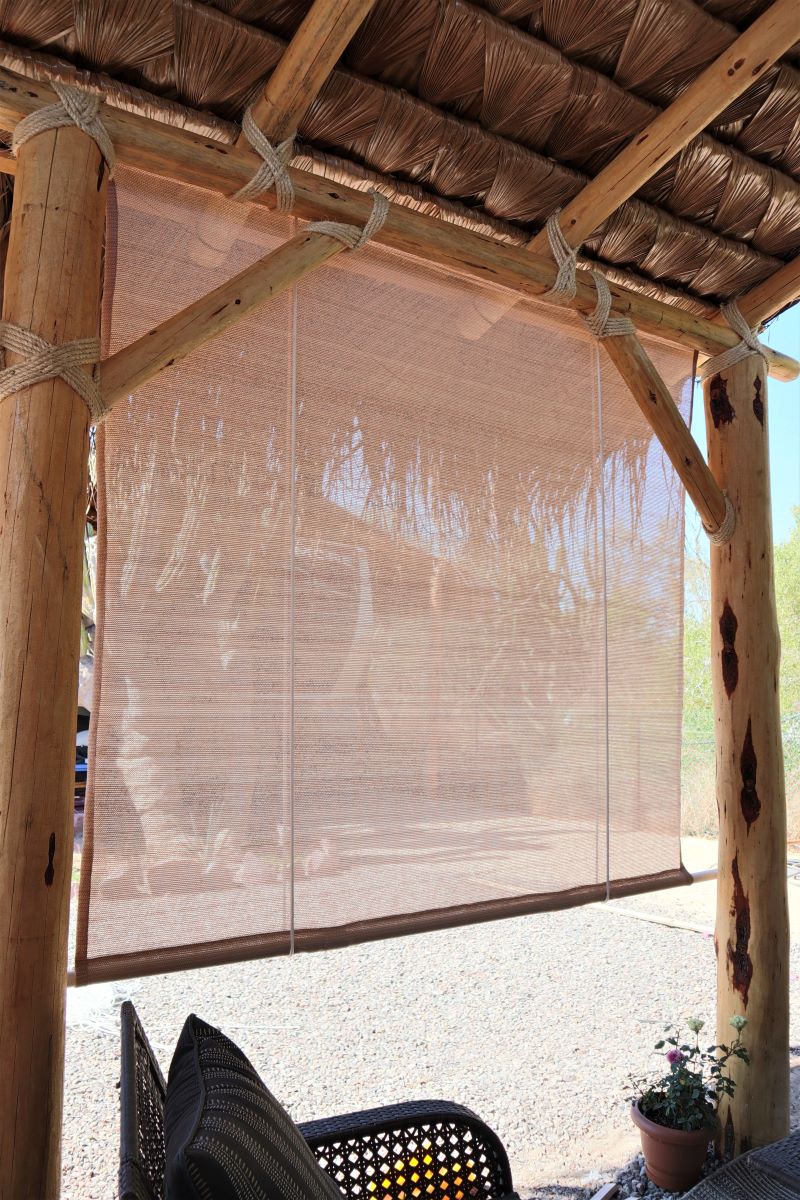
The DIY roller sun shade design is so easy! A piece of shade material is hung from the top of a wall. A piece of rope is fixed on one side of the material and fed through a series of eyelets on the other. When you pull the rope, the material is rolled upwards. You need at least 2 rope systems per panel to make the material roll.
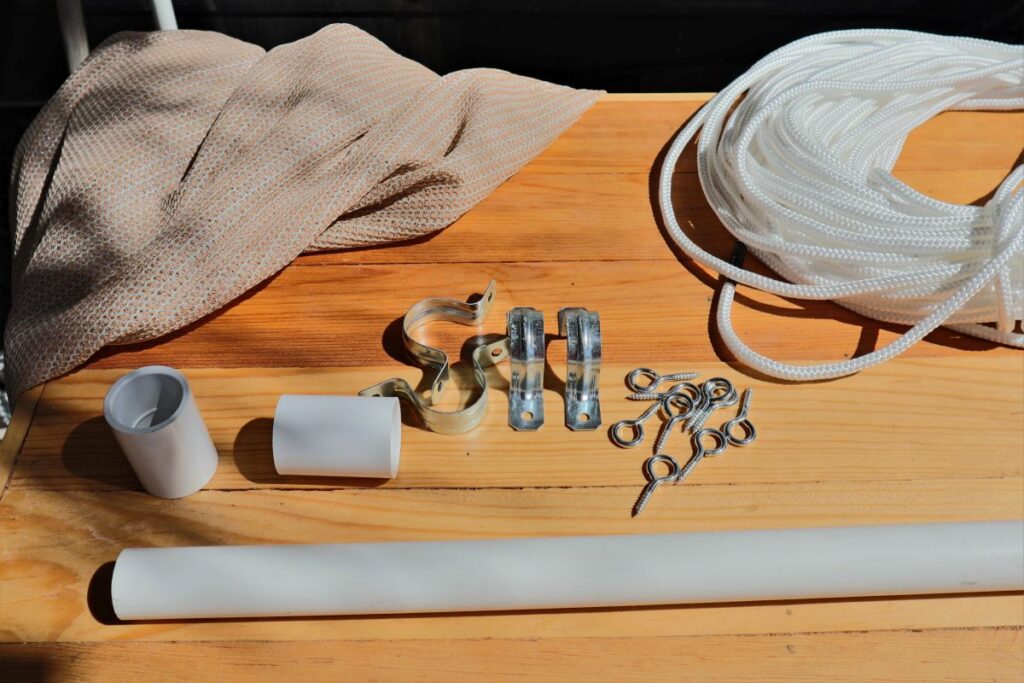
Materials for DIY Sun Shade
For this tutorial, you will need the following materials:
- Shade material (this is similar to what we purchased)
- Rope (we used 5/16″ rope but you could go a little smaller)
- Eyelets (large enough to fit the rope)
- 1 inch PVC piping
- 3/4″ x 2 wood
- PVC caps (optional)
- PVC couplings (optional)
- 2-hole clamps (optional)
- Nails or screws
- Staples
DIY Roller Sun Shade Tutorial
For this project, we needed the sun shade to be the entire length of the front of our patio – in total 22 feet. We also needed the sun shade to be in 3 separate sections because we have 2 living areas and a walkway. This seemed to add a level of complication to the design, but really we just created 3 separate roller shades.
From there, we measured the length of the 3 sections. We cut the PVC pipe longer so that there would be adequate length to catch in the brackets for if there was wind.
For this design, we did have the material sewn. We had a local seamstress hem the 2 sides and create a pocket for the PVC pipe. If you go this route, make sure you consider the extra material required for the hem. If you are team #nosew or don’t have a local seamstress, you could staple the material to create a pocket or use iron on hem tape.
Step 1: Install furring material (potentially optional)
The first step in the DIY roller shade tutorial (after measuring and cutting and sewing), is to install your furring material. Furring are strips of wood that are added in order to level the wall beams. We needed to level out the area because there is rope around the support beams in the palapa.
We used 1×2 wood lengths and installed them using nails.
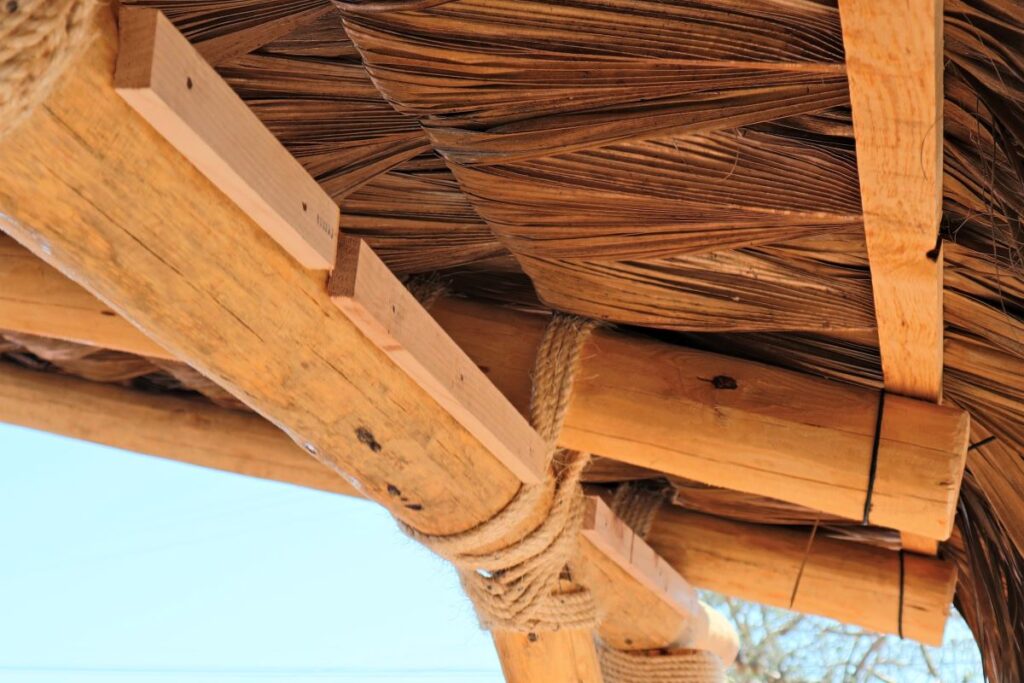
This step may be optional for you. If you have a flat wall beam to use then skip this step!
Step 2: Install the shade material
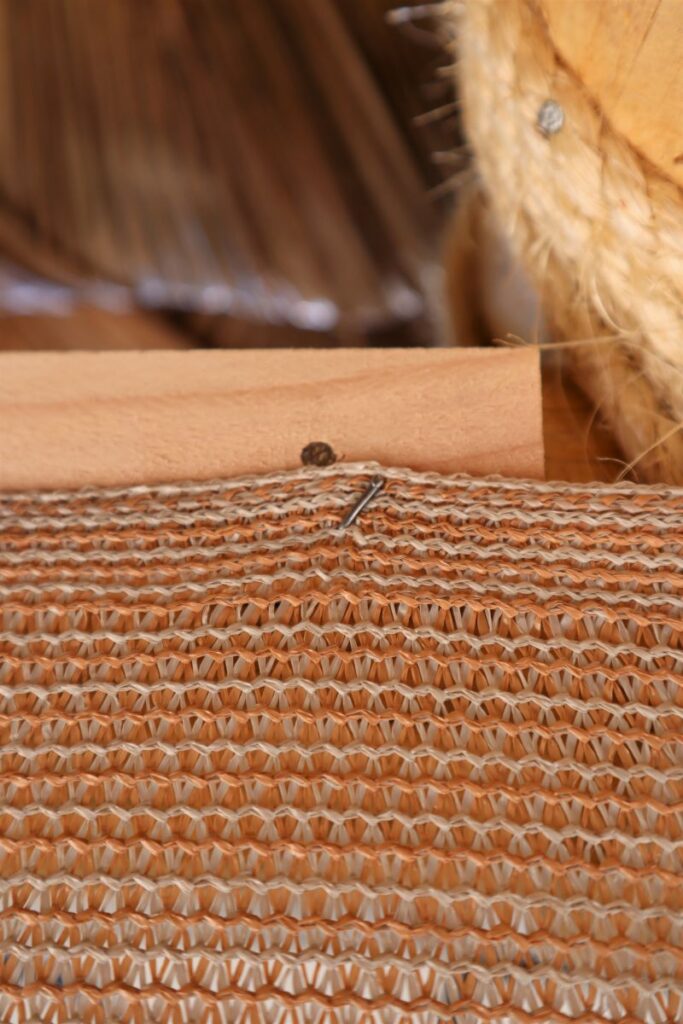
After installing the furring, it is time to install the shade material. I would recommend using staples for this. (If you don’t have staples, like us, you can use brad nails and then bend them over).
Take care to ensure the material is level, straight, and not being pulled unevenly.
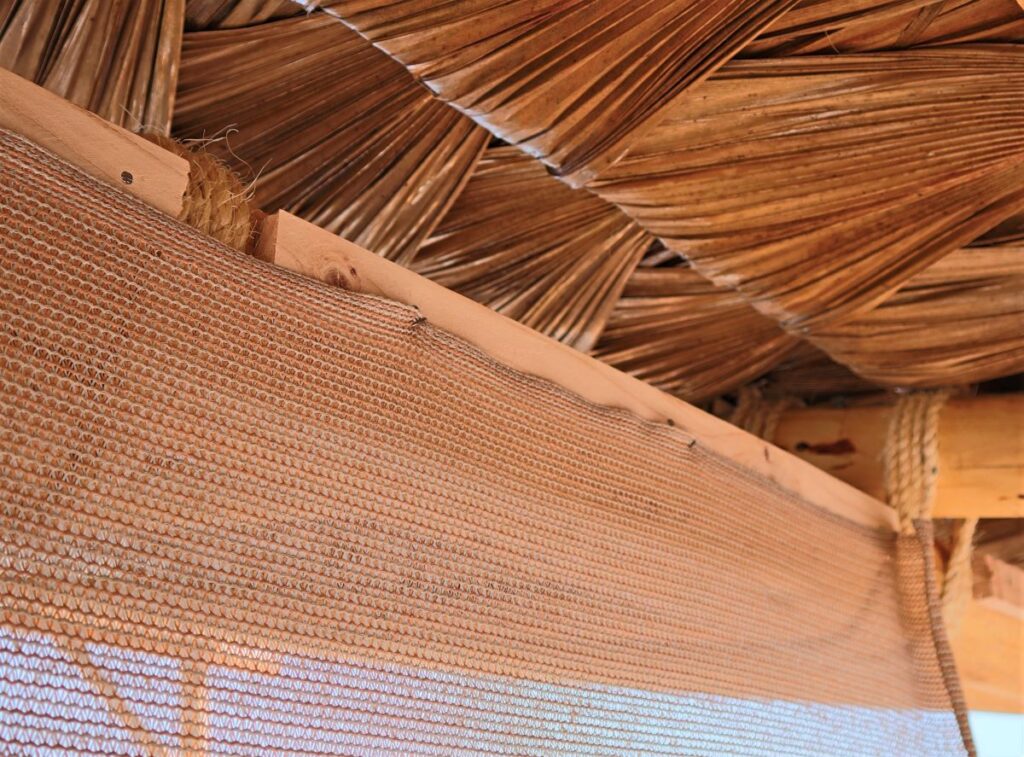
Here is a close up of the installed material. You can see we didn’t have a proper staple but made due with what materials we had.
Step 3: Install the fixed end of the rope
Before you install the second layer of wood over the material, install the fixed end of the rope. The rope creates the “roller” effect that makes these shades so handy!
Tie the end of the rope in a knot and fish it behind the material. Fix the knot by hammering a couple of nails through the rope and wood.
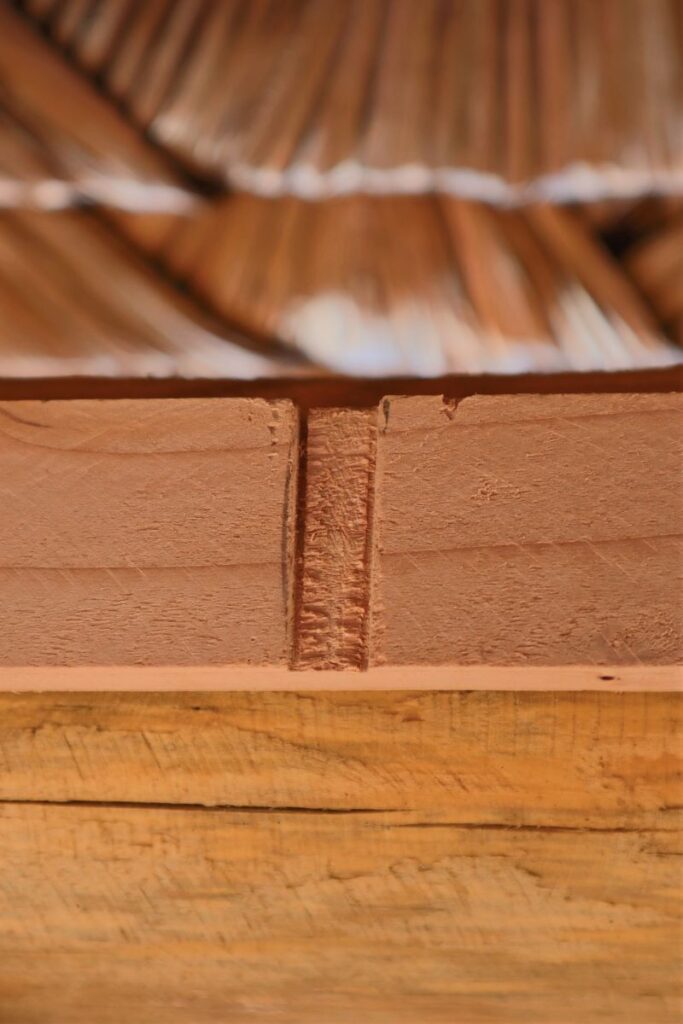
Pro tip: Create a small notch in the furring material for the rope to nestle into.
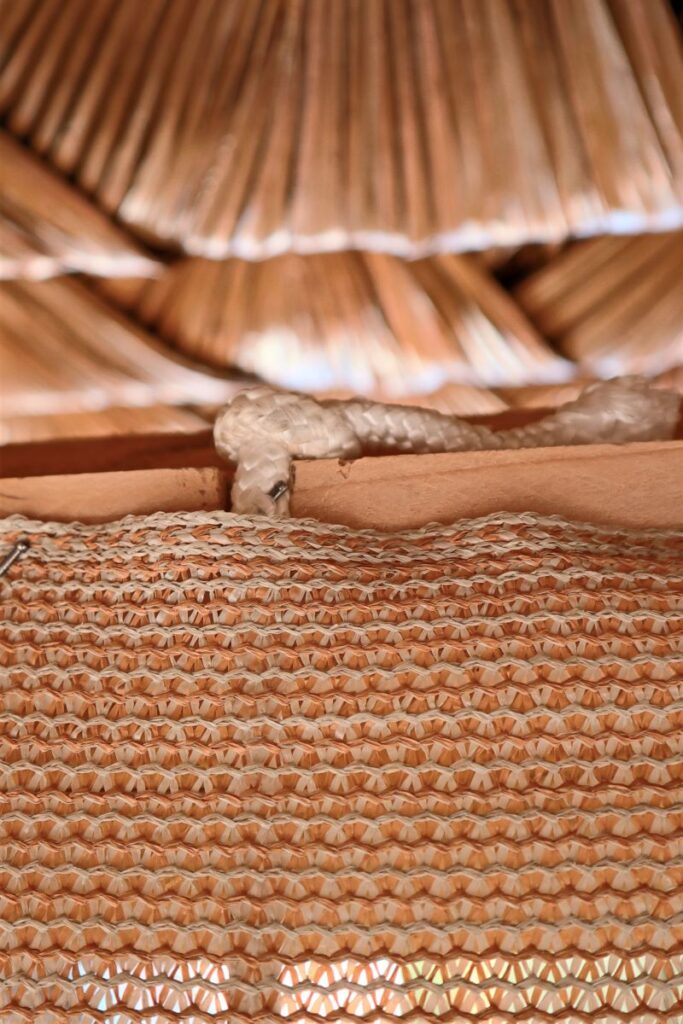
Let the loose end of the rope hang down. You will loop this rope over the material to create the roller after the 2nd layer of wood is installed.
Step 4: Install 2nd layer of wood
After the fixed end of the rope is installed, you create a wood sandwich on the material. There should be a couple of layers now: furring, material/rope knot, and the 2nd layer of wood.
This second layer of wood provides strength and also gives you something to install the eyelets into. Again, we used 1×2 wood and installed with nails.
Step 5: Install eyelets and thread rope
This is the part that creates the actual roller.
For each of our panels, we used 2 ropes. (Trust me, you need at least 2. We tried to use 1 for the small panel in the walk way and it does not roll with just 1). If your panel is very wide, you may need a third rope in the middle.
The 2 ropes are thread through an assembly of eyelets at the top on the wood. They then come together on the side. You pull both ropes to get the sun shade to roll upwards.
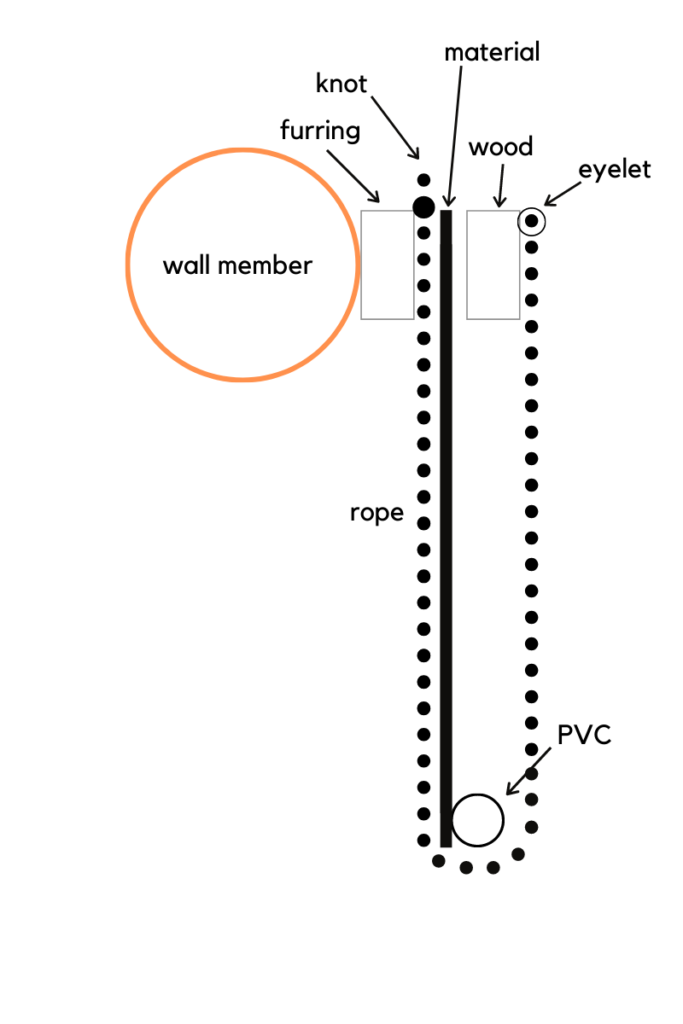
Start with the rope that is furthest from the side where they will both hang – in the below example, that is “rope #1”. “Rope #2” is the rope assembly that is closest to the edge. The 3 highlight marks are where the 2 assemblies come together to become 1.
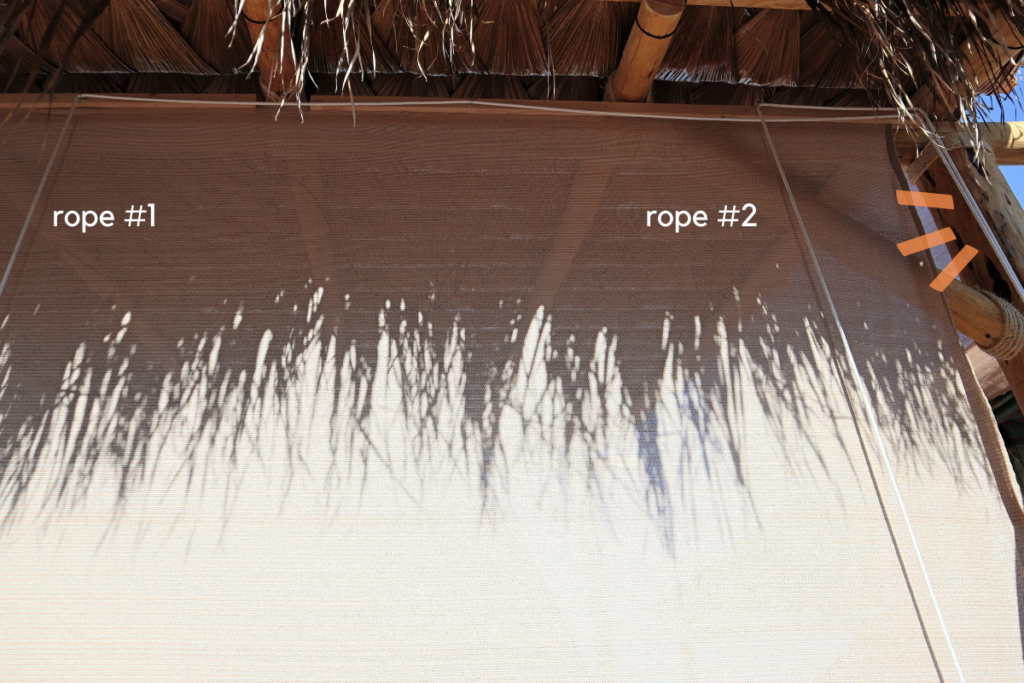
Loop the rope under the material and PVC pipe from the side with the fixed knot to the side where the eyelets are. Now you have more layers: furring, material/rope knot, wood, rope.
Thread the end of the rope through the first eyelet which should be directly inline with the knot. Then run the rope perpendicular to the first section and along the wood. Add eyelets as needed to create a smooth path. When you get to the end of the panel, add an eyelet to direct the rope downwards so it can be pulled.
Here is a graphic so you can see the major points for rope #2. The rope comes directly up to the first eyelet (yellow dot). It then goes perpendicular to the next eyelet, where it is routed downwards. Rope #1 has the same set up but with an added eyelet in the middle.

Step 6: Final steps for the DIY roller shade
Once you have the rope threaded, it is time for the final steps for the roller shade.
We found that in order to create a smooth roll, we needed some weight in the PVC pipe. In our case, we used some left over rebar pieces. You could also use sand or rocks. You only need a little bit of weight. Close the ends of the PVC pipe with the caps if you add weight.
We also installed the 2-hole clamps so that we could hook the shade to something if it was windy.

That’s it! This DIY roller shade is super easy to create. You can easily beat the heat with this design and create a stylish, custom sun shade for a fraction of the cost.
Questions? Let me know below and I will answer them!
Make sure you subscribe for weekly content. Want even more? Follow us on Instagram.